
How to Make Your Dessert Display Look Professional
Guests notice dessert tables before they taste anything. A professional-looking dessert display draws the eye, organizes treats, and makes even simple sweets feel elevated. The goal is visual balance, easy flow, and consistent presentation.
Start by thinking like a host: pick a focal point, control the height and rhythm, and use a limited color palette. If you need tools or inspiration for tabletop pieces, check options in Home and Kitchen to build a foundation for a polished setup.
Plan the layout and guest flow
Before you bring out desserts, map the table in paper or in your head. Place the most impressive item at the focal point—center or slightly off-center depending on the backdrop—and arrange other items to guide guests from one end to the other. Reserve space for plates, napkins, and utensils so lines don’t bottleneck.
Consider what else you’ll need on hand like disposable plates, tongs, or labeled tags; these are often found under Party Supplies that work for quick grab-and-go service at casual events.
Use multiple levels to add drama
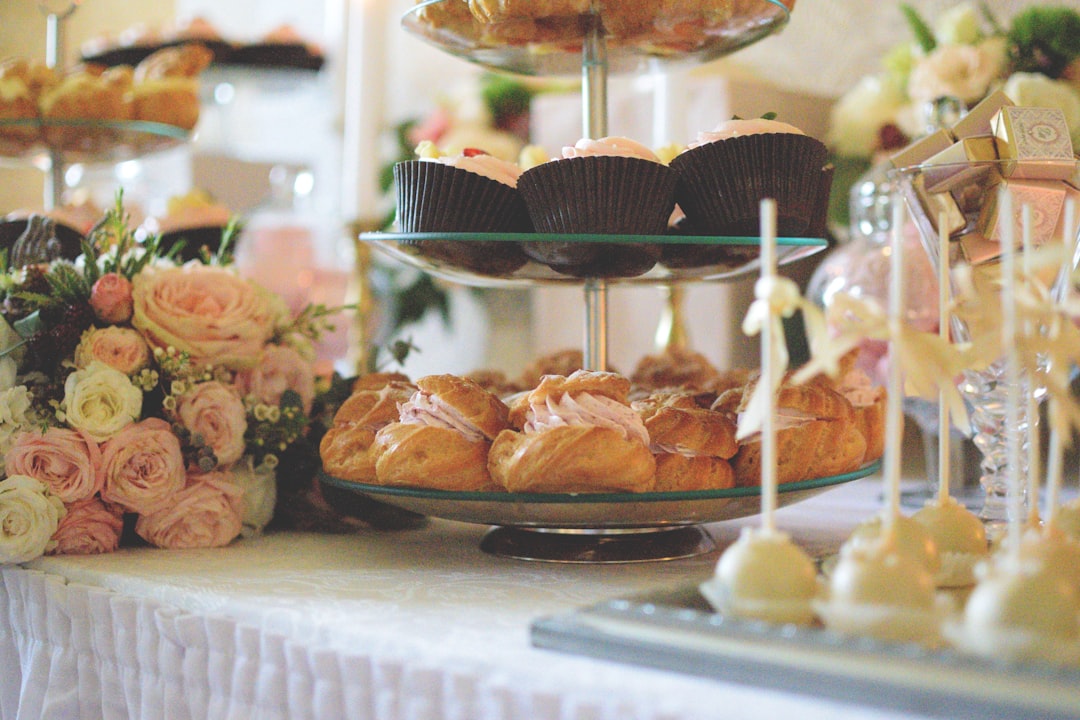
Variation in height creates interest and visibility. Mix cake stands, risers, boxes wrapped in cloth, and stacked platters so items don’t sit all on one plane. A well-placed tiered centerpiece will make smaller pastries readable from across the room.
If you’re investing in reliable display pieces, a dedicated Cake Stands section offers sturdy, attractive options designed for central presentation.
Choose consistent serveware and portioning
Uniform plates and serving utensils communicate care. Match plate size to portion: small plates for petite desserts, larger for plated slices. Use matching tongs, cake servers, and scoops to keep the table visually cohesive and hygienic.
Browse coordinated options in Dinnerware and Serveware to curate items that work together and withstand quick turnover during an event.
Layer textures and color with linens
Linens anchor the display. A neutral tablecloth creates a calm backdrop for colorful desserts; textured runners or placemats add tactility. Keep the palette to two or three colors and repeat them in garnishes and signage for cohesion.
For durability and style, check plain or patterned options in Tablecloths—they’re a simple way to change the tone from rustic to refined without replacing every piece on the table.
Light and backdrop: make desserts pop
Good lighting is essential. Soft, directional light highlights texture (glaze, powdered sugar, frosting swirls). Avoid harsh overhead fluorescents; supplement with warm LED uplights, string lights, or spot lamps to create depth and focus.
A clean backdrop removes visual clutter. Use simple banners, garlands, or fabric drapes to frame the table. Small decorative elements that match your theme help sell the overall look—see tasteful options in Decorations for ideas that won’t compete with the food.
Garnishes, signage and small finishing touches
Finishing touches give snacks personality and clarity. Fresh herbs, citrus zest, edible flowers, or a dusting of cocoa are inexpensive ways to elevate appearance. Use small labels to identify flavors and allergens—clean, printed cards look more professional than handwritten tape.
Complete the service setup by placing cutlery, napkins, and serving trays where guests can reach them without crossing the display; you’ll find coordinated entertaining pieces in Dining and Entertaining selections that simplify this step.
Keep it tidy and replenished
A professional display stays orderly throughout the event. Assign one person to monitor the table, refill platters, remove crumbs, and replace empty labels. Use covered containers or cloches to protect items between service times and keep spare portions ready in the kitchen to swap in quickly.
If you’re transporting extras and staging stations off-site, browse practical kit items in Event and Party Supplies to streamline setup and teardown.
Transport and setup best practices
Move desserts in shallow, stable containers and carry trays level. Wrap cake stands or tiered displays separately and assemble on-site if possible. Bring all adhesives, non-slip shelf liner, and a small toolkit (scissors, tape, extra labels) to handle last-minute fixes.
Lay out items in the same arrangement during a quick rehearsal before guests arrive so you know how pieces fit and where to place backups.
Quick checklist
- Decide focal point and guest flow before placing items
- Use at least three height levels (cake stand, riser, flat platter)
- Match plates and utensils; pre-portion where possible
- Choose a limited color palette and coordinating linens
- Prepare labels for flavors and allergens
- Assign someone to tidy and replenish during the event
- Pack a setup kit for transport and on-site fixes
FAQ
Q: What’s the easiest way to make a table look cohesive?
A: Pick a unifying element—color, material (wood/metal), or pattern—and repeat it across linens, signage, and serving pieces.
Q: How many desserts should I display per guest?
A: Offer 2–3 small portions per guest plus one showpiece cake. For large events, adjust quantities based on whether dessert is plated or buffet-style.
Q: Should I label allergens on a buffet-style dessert table?
A: Yes. Clear labels for common allergens (nuts, dairy, gluten) protect guests and reduce questions at the table.
Q: How do I keep small pastries from looking messy?
A: Use shallow liners, stack vertically when appropriate, and rotate platters often. Keep tongs or scoops nearby so guests don’t crowd a single item.
Q: Can I reuse decorations across themes?
A: Absolutely. Neutral backdrops and interchangeable accents (ribbons, small garlands) adapt easily; keep a core kit of multipurpose decorations on hand.
Conclusion
A professional dessert display is planned, layered, and maintained. Focus on height, consistent serveware, clean signage, and simple lighting—then assign one person to keep the table tidy. With a short prep checklist and a few reliable pieces, you’ll create a dessert setup that looks curated and effortless.